
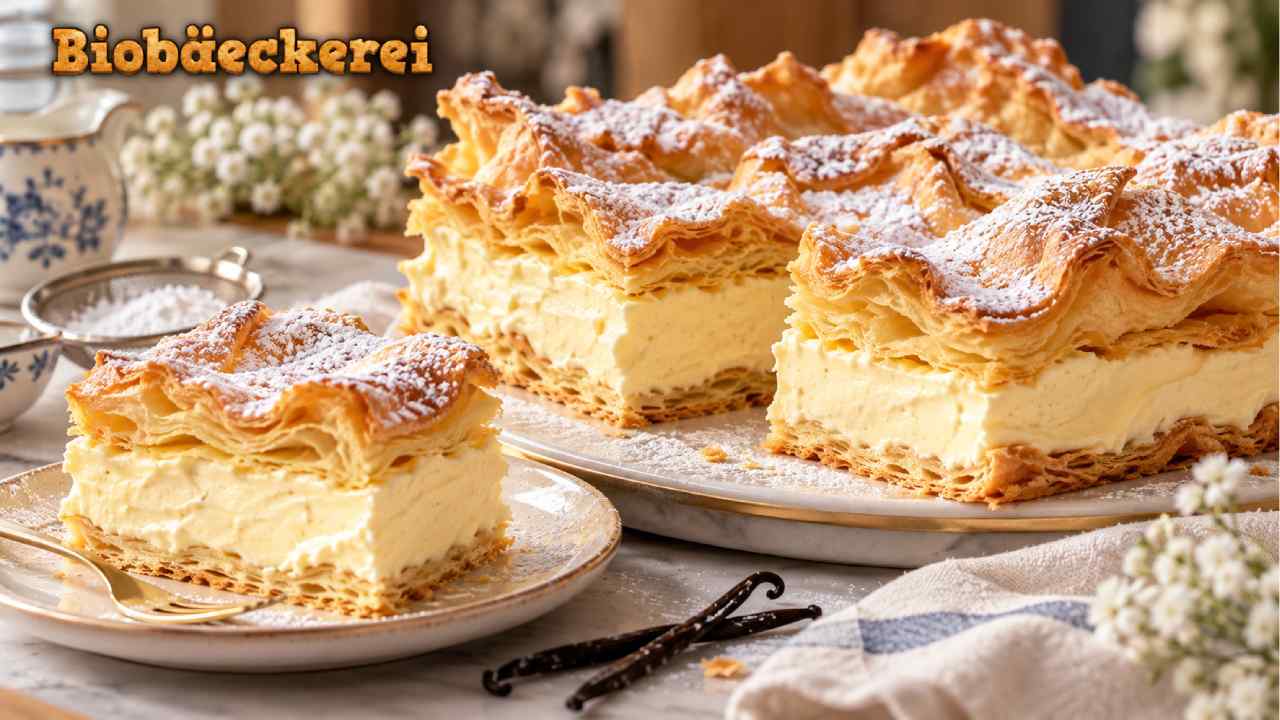
Polish Karpatka Recipe: Cream Cake with Wavy Pastry Layers
Biobaeckerei – The Polish Karpatka recipe creates a dessert that looks dramatic without relying on elaborate decoration. Its signature feature is the uneven choux pastry surface, which rises into peaks and valleys while baking. Once dusted with powdered sugar, those ridges resemble snowy mountain scenery. In fact, the cake’s name is commonly associated with Poland’s Carpathian Mountains. Between the pastry layers sits a generous amount of silky vanilla custard cream. Therefore, every slice offers an appealing contrast between delicate pastry and rich filling. Unlike a standard sponge cake, Karpatka does not need perfectly smooth layers to look beautiful. Its irregular shape is actually part of its identity. That rustic character also makes the dessert feel approachable for home bakers. At first glance, it may look like a bakery showpiece. However, the basic techniques are familiar, especially for anyone who has previously prepared choux pastry or homemade custard.
Read Also: Dubai Chewy Cookies Lose Hype as Chinese Tea Emerges
The Wavy Choux Pastry Gives Karpatka Its Distinctive Character
The pastry is what immediately separates Karpatka from many other European cream cakes. Rather than using puff pastry or sponge, the traditional style relies on choux pastry made from water, butter, flour, eggs, and a small amount of salt. First, water and butter are heated together. Flour is then stirred into the hot liquid until a smooth dough forms and begins pulling away from the pan. After the mixture cools slightly, eggs are incorporated gradually. This step matters because the dough needs enough moisture to expand in the oven without becoming excessively loose. During baking, steam pushes the pastry upward and creates the characteristic rugged surface. Consequently, there is no reason to flatten every ridge before the pan enters the oven. Those natural bumps eventually become one of the cake’s most attractive details. For the best texture, bake the pastry until it looks deeply golden and feels dry rather than pale or soft.
Vanilla Custard Cream Creates a Smooth and Luxurious Center
While the pastry provides structure, the cream gives Karpatka its comforting personality. A classic filling can be prepared with milk, egg yolks or whole eggs, sugar, vanilla, and starch or flour. The ingredients are cooked gently until the custard becomes thick and glossy. Afterward, it must cool completely before being combined with softened butter, depending on the recipe style. This creates a stable yet creamy filling that can support the upper pastry layer. More importantly, the vanilla flavor should remain noticeable without becoming overly sweet. Karpatka works particularly well because its pastry is relatively neutral. Therefore, the custard can deliver richness while the pastry prevents each bite from feeling too heavy. For a cleaner flavor, real vanilla extract, vanilla paste, or vanilla bean can be used. Meanwhile, a small pinch of salt helps balance the sweetness and makes the dairy notes more pronounced.
Simple Ingredients Are Enough for an Authentic Homemade Karpatka
One reason the Polish Karpatka recipe remains appealing is its straightforward ingredient list. For the pastry, prepare about 125 grams of unsalted butter, 250 milliliters of water, 150 grams of all-purpose flour, four large eggs, and a pinch of salt. Depending on egg size and flour absorption, the final egg may need to be added gradually. For the filling, use roughly 500 milliliters of whole milk, 100 grams of sugar, two egg yolks, 40 grams of cornstarch, vanilla, and about 150 to 200 grams of softened unsalted butter. Powdered sugar is also useful for the classic finishing touch. Although these ingredients seem ordinary, temperature control makes a major difference. The custard should be completely cool before it meets the butter. Likewise, the baked pastry layers should reach room temperature before assembly. Otherwise, excess warmth can soften the structure and cause the filling to lose its stable consistency.
Baking the Pastry Correctly Makes the Difference
Start by bringing the water, butter, and salt to a gentle boil. Add the flour at once, then stir firmly until the mixture forms a cohesive ball. Continue cooking it briefly to remove some excess moisture. Next, transfer the dough to a bowl and allow it to cool for several minutes. Add the eggs one at a time while mixing thoroughly after each addition. The finished dough should appear smooth, glossy, and thick enough to hold soft ridges. Divide it between two lined baking pans of equal size, or bake each layer separately in the same pan. Instead of smoothing the surface completely, leave several natural waves. Bake at around 200°C until the pastry rises and becomes golden. Most importantly, avoid opening the oven too early because a sudden temperature change can cause the pastry to collapse. Once baked, cool both layers fully before adding the custard filling.
Preparing the Custard Requires Patience Rather Than Complicated Skills
To make the filling, heat most of the milk with vanilla until it becomes hot but does not aggressively boil. In another bowl, whisk the remaining milk with sugar, egg yolks, and cornstarch until smooth. Slowly introduce some hot milk into the egg mixture while whisking. This gradual process reduces the chance of scrambling the eggs. Then, return everything to the saucepan and cook over medium-low heat. Stir continuously until the custard thickens noticeably. Once bubbles begin appearing, cook briefly while continuing to stir so the starch develops properly. Transfer the custard to a clean bowl and cover its surface directly to prevent a skin from forming. After it reaches room temperature, beat the softened butter until creamy. Gradually add the custard while mixing until the filling becomes light and smooth. Using ingredients at similar temperatures helps prevent the cream from splitting.
Assembly Turns Two Rustic Pastry Layers Into an Elegant Cake
Once every component is completely cool, assembling Karpatka becomes surprisingly simple. Place the flatter pastry layer at the bottom of a springform pan or serving frame. Spread the vanilla cream evenly across its surface, making sure the filling reaches the edges. Next, position the more dramatically textured pastry layer on top. Press it only very gently because excessive pressure can force the cream outward. At this stage, the cake already has its recognizable mountain-like appearance. However, chilling is essential before slicing. Refrigerate the assembled Karpatka for several hours, preferably four hours or longer. During this period, the filling firms while the pastry absorbs just enough moisture to become pleasantly tender without losing all of its character. Finally, dust the upper surface generously with powdered sugar. The white coating settles naturally across the uneven peaks, emphasizing the landscape-like appearance that makes this Polish dessert so memorable.
Texture Is the Secret Behind a Memorable Slice of Karpatka
A successful Karpatka is not simply soft from top to bottom. Instead, its appeal comes from contrasting textures. The outer pastry should retain a delicate bite, while the inner surface becomes slightly tender after resting against the custard. Meanwhile, the cream should feel smooth and stable rather than runny. This combination makes the dessert interesting even though its flavor profile remains relatively simple. In my view, this balance is also why Karpatka can feel lighter than its generous cream layer suggests. Vanilla provides warmth, butter adds richness, and the pastry contributes a subtle toasted flavor. Furthermore, powdered sugar offers sweetness without covering the dessert in heavy frosting. For cleaner portions, use a sharp serrated knife and cut gently through the upper pastry before slicing downward. Wiping the blade between portions also helps preserve the attractive cream layer.
Small Baking Adjustments Can Improve the Final Result
Several practical details can make a noticeable difference when preparing this Polish Karpatka recipe. First, measure flour accurately because too much flour may produce dense pastry. Second, add the eggs gradually rather than assuming every batch requires exactly the same amount. Flour, egg size, and moisture loss during cooking can change the dough consistency. In addition, make sure the pastry receives enough baking time. Removing it while still pale can leave the center damp and more likely to collapse. The custard deserves equal attention. If it feels lumpy, whisk it thoroughly while warm or pass it through a fine sieve before cooling. When combining custard and butter, both should be close to the same temperature. Finally, give the assembled cake enough refrigerator time. Although tasting it immediately may be tempting, a well-chilled Karpatka slices more neatly and develops a more balanced texture.
Karpatka Shows Why Traditional Polish Desserts Still Feel Modern
Karpatka proves that a dessert does not need complicated decoration to create visual impact. Its dramatic pastry surface forms naturally in the oven, while powdered sugar transforms those irregular ridges into the cake’s signature appearance. At the same time, the vanilla custard center offers the familiar comfort of classic European pastry. This combination makes Karpatka suitable for family gatherings, afternoon coffee, celebrations, or a weekend baking project. It can also inspire subtle variations. For example, orange zest can brighten the custard, while a restrained amount of almond extract can create a warmer aroma. Nevertheless, the classic vanilla version remains especially appealing because it allows the contrast between pastry and cream to take center stage. For home bakers seeking something different from ordinary layer cakes, Karpatka offers an excellent middle ground: visually impressive, technically interesting, yet built from accessible ingredients and traditional techniques.
