
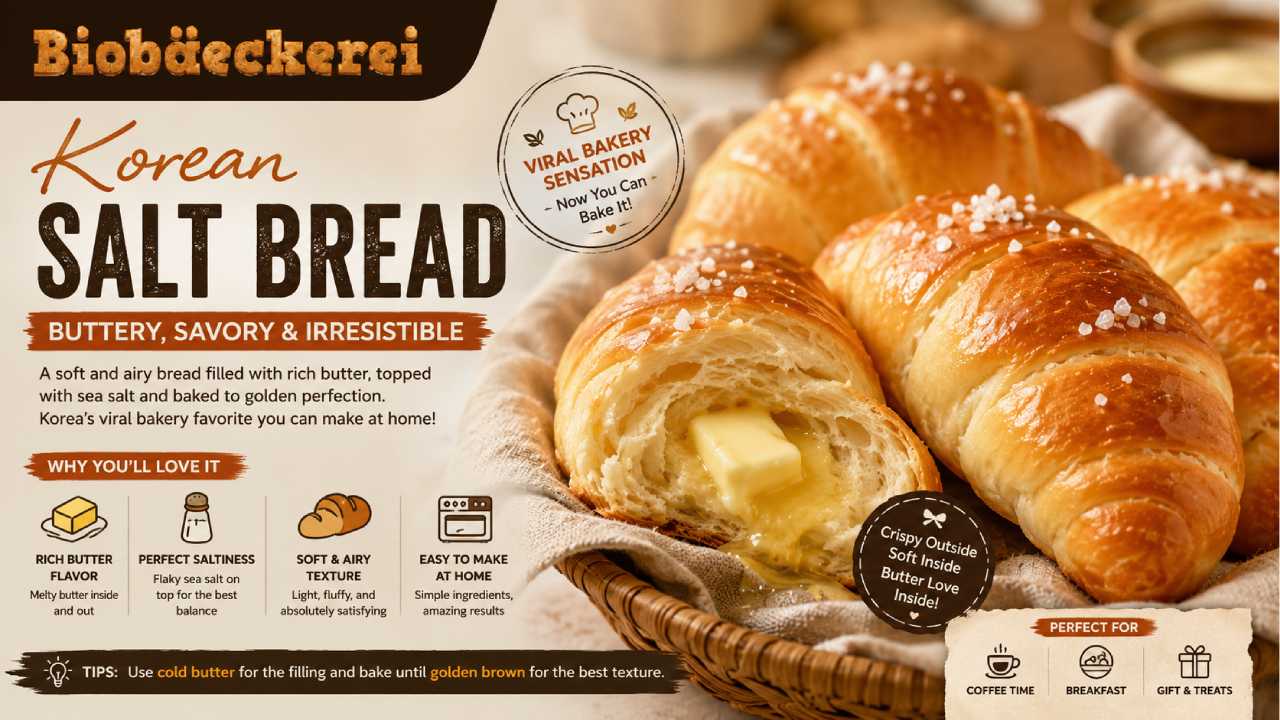
Korean Salt Bread Recipe: The Buttery, Savory Bread Everyone Loves
Biobaeckerei – Walk into a trendy bakery in Seoul, and there is a good chance you will spot small crescent-shaped rolls with golden tops. Korean salt bread has become a bakery favorite because it combines simplicity with an addictive contrast of textures. A good Korean Salt Bread Recipe creates bread that is soft inside, lightly crisp underneath, and rich with melted butter. In Korea, the bread is commonly called sogeum ppang, which simply means salt bread. Its concept is closely related to Japanese shio pan, a buttery salted roll that became popular before similar versions spread through Korean bakeries. What makes the bread memorable is not an elaborate filling or decoration. Instead, butter and salt provide most of its character. During baking, some butter melts from the dough and reaches the baking tray. As a result, the bottom develops a deliciously crisp and buttery layer while the center remains tender.
Read Also: Viral Poffertjes Chocolate Fruit Cup Is the Dessert Everyone Wants to Try
Why Korean Salt Bread Tastes So Good
The appeal of Korean salt bread comes from balance. The dough has a mild flavor, while the butter adds richness and the salt provides contrast. Therefore, every ingredient has a clear purpose. Unlike an extremely sweet milk bread, salt bread usually keeps sweetness restrained. This allows the aroma of butter to remain noticeable. Meanwhile, the exterior develops a delicate crust during baking. The center should stay tender rather than dry. Another important detail is the butter hidden inside each roll. As the oven heats up, that butter melts and creates small pockets inside the bread. Some of it may escape onto the baking sheet, which is completely normal. In fact, the melted butter helps produce the characteristic toasted bottom. For the best result, use good-quality butter and avoid excessive flour while shaping. A dough that remains slightly soft will generally produce a lighter texture.
Ingredients for Homemade Korean Salt Bread
This Korean Salt Bread Recipe makes approximately eight medium-sized rolls. Measuring ingredients with a kitchen scale will give the most consistent result.
• 300 g bread flour
• 20 g granulated sugar
• 5 g fine salt
• 5 g instant yeast
• 15 g milk powder, optional
• 180 g lukewarm whole milk
• 20 g unsalted butter, softened
• 80 g cold unsalted butter for the filling
• 1–2 tablespoons milk for brushing
• Flaky sea salt for topping
Cut the 80 grams of filling butter into eight equal batons before shaping the dough. Then, keep them refrigerated until needed. Cold butter is easier to wrap and is less likely to disappear into the dough before baking. Bread flour is useful because its higher protein content supports a chewy yet tender structure. However, flour absorption can vary by brand. Therefore, avoid adding extra flour too quickly if the dough initially feels slightly sticky.
Step-by-Step Korean Salt Bread Recipe
- Combine bread flour, sugar, salt, instant yeast, and milk powder in a large mixing bowl. Keep the salt and yeast separated initially before mixing everything together.
- Add the lukewarm milk. Mix until a rough dough forms. Knead for about five minutes before adding the softened butter.
- Continue kneading for around 8–12 minutes. The dough should become smooth, elastic, and slightly tacky.
- Shape the dough into a ball. Cover it and leave it in a warm place until roughly doubled in size. Depending on room temperature, this may take 60–90 minutes.
- Gently deflate the risen dough. Divide it into eight equal portions and shape each piece into a ball.
- Cover the portions and let them rest for about 15 minutes. This relaxes the gluten and makes shaping easier.
- Roll each piece into a long teardrop or triangle. Place one cold butter baton at the wide end.
- Roll the dough toward the narrow tip, similar to shaping a small croissant. Place each roll seam-side down on a lined baking tray.
- Cover loosely and proof for around 30–45 minutes. The rolls should look noticeably puffier but still hold their shape.
- Brush the tops lightly with milk. Then, sprinkle a small amount of flaky sea salt over each roll.
- Bake in a preheated oven at 200°C for about 15–18 minutes. Remove them when the tops are deeply golden and the bottoms look crisp.
- Let the bread rest for several minutes before serving. The melted butter will be extremely hot immediately after baking.
Shaping Creates the Signature Salt Bread Look
Shaping is one of the most enjoyable parts of making salt bread. After the first fermentation, each dough portion should be stretched into an elongated triangle. The wider end holds the butter, while the narrow end creates the curved finish. Once the cold butter is positioned, roll the dough forward without squeezing too tightly. A little space around the butter is useful because steam and melted fat will move during baking. Next, gently curve the ends if you want the familiar crescent appearance. However, appearance should not become more important than texture. Overworking the dough during shaping can remove too much gas and create a dense roll. Therefore, handle each piece with moderate pressure. If the dough keeps shrinking while being rolled, cover it and wait another five minutes. Gluten relaxes during rest, making the dough easier to stretch without tearing. This small step can make the final shape noticeably cleaner.
The Butter Leak Is Actually Part of the Magic
First-time bakers may become worried when butter begins leaking from the rolls in the oven. However, a moderate amount of leakage is expected in this style of bread. The butter melts inside the roll before some of it reaches the baking tray. The bottom of the dough then cooks in that hot fat. As a result, it develops a crisp, almost fried texture that contrasts beautifully with the soft interior. Nevertheless, losing nearly all the butter too early may indicate a problem. The filling may have been too warm, or the dough may not have sealed properly. Therefore, keep the butter cold until shaping. Also, place the seam underneath each roll before baking. A sufficiently hot oven matters as well. If the oven is too cool, butter can melt before the dough structure sets. Preheating thoroughly helps the rolls rise quickly while developing a golden exterior.
How to Get a Soft Interior and Crispy Bottom
Texture separates excellent salt bread from an ordinary dinner roll. The inside should feel light and tender, while the base offers a noticeable crispness. Several small techniques help achieve that result. First, knead the dough until gluten develops properly. Strong gluten traps fermentation gases and supports a lighter crumb. Second, avoid adding excessive flour during kneading. A slightly tacky dough is usually preferable to a stiff, dry one. Third, give the dough enough time to ferment. However, do not rely only on the clock. Room temperature can make fermentation faster or slower. Watch the dough instead. Finally, bake the rolls until they develop enough color. Pale bread may look soft, but it often lacks the toasted flavor that makes Korean salt bread appealing. The contrast between golden crust, buttery base, and fluffy center is what gives this bread its signature character.
Choosing the Right Salt Makes a Difference
Salt plays two different roles in this recipe. Fine salt goes into the dough, where it strengthens flavor and helps regulate fermentation. Flaky salt goes on top, where it provides small bursts of salinity. Therefore, the topping should be used carefully. Too much salt can overpower the butter and make the bread unpleasant. A small pinch on each roll is usually enough. Flaky sea salt works particularly well because its larger crystals provide texture without covering the entire surface. Meanwhile, avoid dramatically reducing the salt inside the dough unless necessary. Bread without enough salt can taste flat even when high-quality butter is used. The goal is balance rather than maximum saltiness. When sweetness, butter, toasted flour, and salt work together, the bread develops a surprisingly complex flavor from a short ingredient list.
Common Mistakes to Avoid When Making Salt Bread
One common mistake is using warm butter for the filling. Soft butter can escape before the dough has enough time to set. Therefore, keep the filling refrigerated. Another problem is overproofing. Dough that rises for too long may become weak and collapse during baking. On the other hand, underproofed rolls can turn out dense. Watch for a visibly puffy texture rather than following time alone. Oven temperature is another important factor. Home ovens can vary significantly, so an oven thermometer can be helpful when results seem inconsistent. Additionally, avoid covering the dough with too much flour during shaping. Excess flour can prevent the layers from adhering properly. Finally, do not expect every roll to look identical on the first attempt. Salt bread is simple in ingredients but surprisingly technical in execution. After one or two batches, shaping and fermentation become much easier to judge.
How to Serve Korean Salt Bread at Its Best
Korean salt bread is at its best while slightly warm. At this stage, the interior remains soft, the butter aroma is pronounced, and the bottom retains its crisp texture. The bread works well on its own because the butter and salt already provide plenty of flavor. However, it can also accompany coffee, tea, or a simple breakfast. If the rolls have cooled completely, reheat them briefly in an oven or air fryer rather than a microwave. Dry heat can restore some crispness, while microwaving tends to soften the crust. Leftovers can be stored in an airtight container after they cool completely. For longer storage, freezing is usually more practical than refrigerating because refrigeration can accelerate bread staling. Once reheated, a well-made roll can regain much of its original texture. That makes this Korean Salt Bread Recipe suitable for both weekend baking and make-ahead treats.
Why Korean Salt Bread Continues to Win Over Bread Lovers
The charm of Korean salt bread comes from how much flavor it creates with relatively ordinary ingredients. Flour, yeast, milk, butter, and salt transform into a roll with several contrasting textures. There is a soft center, a golden shell, a buttery pocket, and a crisp base. Moreover, the recipe offers enough technique to feel rewarding without requiring complicated decoration. That combination helps explain why salt bread works so well in modern bakery culture. It photographs beautifully, tastes comforting, and pairs naturally with coffee. Still, the best reason to make it at home is freshness. Few things compare with eating a warm roll only minutes after it leaves the oven. Once you understand fermentation, cold butter filling, and proper baking temperature, this Korean Salt Bread Recipe becomes surprisingly approachable. The trend may evolve, but buttery bread with a crisp bottom and a touch of sea salt has timeless appeal.
