
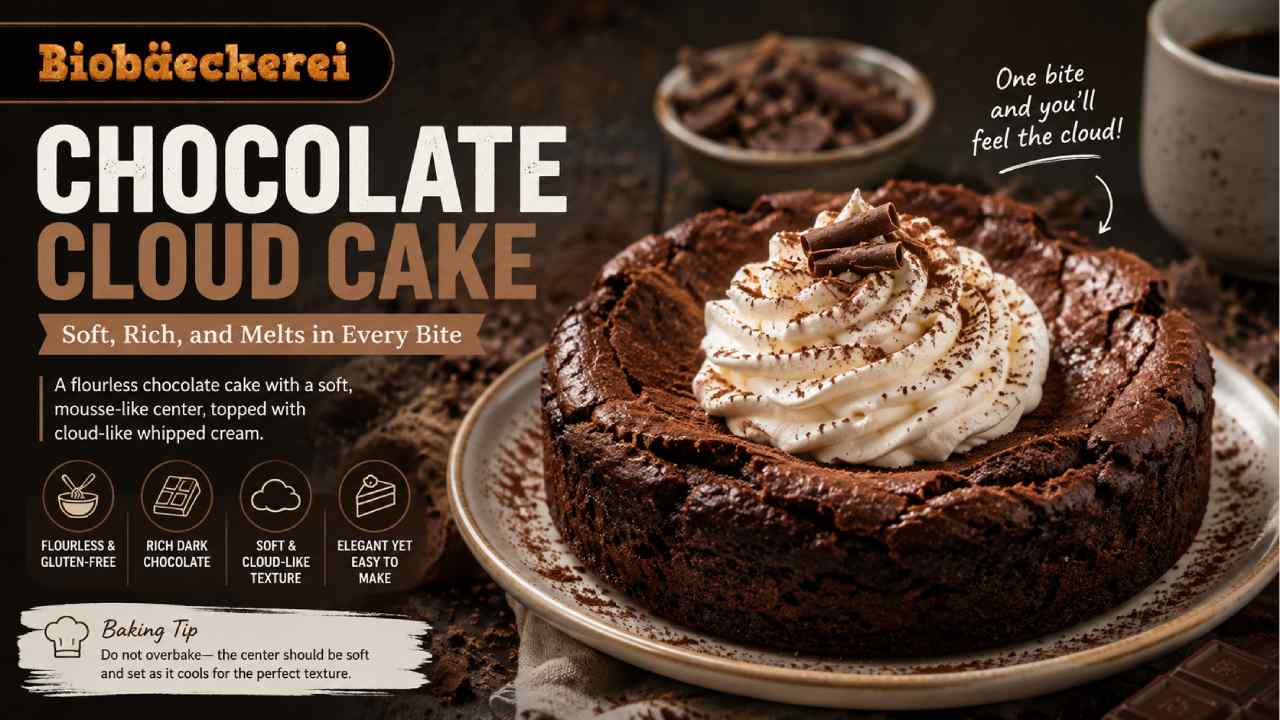
Chocolate Cloud Cake Recipe, Soft and Melting in Every Bite
Biobaeckerei – Chocolate Cloud Cake is the kind of dessert that looks dramatic yet feels surprisingly light on the palate. Instead of relying on a dense layer of flour, this style of chocolate cake gets much of its structure from eggs and melted chocolate. As a result, the center can remain soft and almost mousse-like while the exterior develops a delicate crust. The cake may sink slightly as it cools, creating the rustic shape associated with many flourless chocolate cakes. However, that collapse is not necessarily a baking failure. It happens as trapped air contracts and the delicate structure settles. A soft cloud of lightly whipped cream makes a natural topping because it balances the intense chocolate underneath. Therefore, this dessert works especially well when you want something rich without the heavy crumb of a traditional chocolate layer cake. The recipe below uses straightforward ingredients, moderate baking heat, and careful egg handling to create that characteristic contrast between a tender center and a lightly set exterior.
Baca Juga: This Creamy Garlic Shrimp Turns a Simple Dinner Into Something Special
What Makes Chocolate Cloud Cake Different?
A traditional chocolate cake usually depends on flour to create its crumb. Chocolate Cloud Cake, however, can be made without flour. Eggs provide much of the structure, while chocolate and butter supply richness. Separating the eggs also changes the final texture. The yolks enrich the chocolate mixture. Meanwhile, whipped egg whites trap tiny air bubbles that expand during baking. Consequently, the cake rises even without chemical leaveners such as baking powder. Once removed from the oven, it may gradually settle in the center. This gives the cake its recognizable cloud-like appearance. The texture also sits somewhere between a flourless chocolate cake, soufflé, and soft chocolate torte. Still, it should not be completely liquid inside. Proper baking allows the edges to set while keeping the center tender. In my view, this contrast is what makes the dessert memorable. You get a slightly firmer outer layer followed by a softer, deeply chocolate interior. Better yet, the sunken center creates a natural space for whipped cream.
Ingredients for a Soft Chocolate Cloud Cake
For one Chocolate Cloud Cake, use a 20 cm or 8-inch round springform pan. You will need 200 g dark chocolate, preferably around 60–70% cocoa solids, 115 g unsalted butter, 6 large eggs, 150 g granulated sugar, 1 teaspoon vanilla extract, and 1/4 teaspoon fine salt. For the topping, prepare 240 ml cold heavy cream and 1 tablespoon powdered sugar. You can also add unsweetened cocoa powder or finely shaved chocolate before serving. These ingredients create a cake with a strong chocolate flavor without making the topping excessively sweet. Dark chocolate around 60–70% works particularly well because it provides enough cocoa intensity while still melting smoothly. However, chocolate brands vary in sweetness. Therefore, the finished flavor may change slightly depending on the bar you choose. Use real chocolate rather than chocolate-flavored coating for the best texture. Additionally, room-temperature eggs are easier to incorporate evenly. The cream, on the other hand, should remain cold because chilled cream whips more reliably.
Prepare the Pan and Oven First
Before mixing the batter, preheat the oven to 175°C or 350°F. Grease the base and sides of an 8-inch springform pan. Then, line the bottom with parchment paper. This preparation matters because Chocolate Cloud Cake has a delicate structure. Once baked, rough handling can easily damage its soft center. A springform pan makes removal much easier. Next, check that your mixing bowl for the egg whites is completely clean and dry. Even a small amount of fat can interfere with the foam. It also helps to prepare every ingredient before melting the chocolate. Once the components are ready, the batter comes together fairly quickly. Therefore, good preparation reduces the chance of leaving melted chocolate or whipped whites sitting for too long. If you use a dark-colored metal pan, start checking the cake a little earlier because it may absorb heat more efficiently. Oven temperatures can also vary. For that reason, visual signs of doneness are more useful than relying only on a timer.
Melt the Chocolate and Butter Gently
Place the dark chocolate and butter in a heatproof bowl. Melt them together over a saucepan containing a small amount of gently simmering water. Make sure the bottom of the bowl does not touch the water. Alternatively, use a microwave in short intervals, stirring between each round. Once smooth, remove the chocolate mixture from the heat. Then, let it cool for several minutes. Chocolate that is extremely hot can affect the eggs when the ingredients are combined. Meanwhile, separate the eggs carefully. Place the yolks in one bowl and the whites in another clean bowl. Whisk the yolks with part of the sugar until slightly lighter. Add vanilla and salt. Next, slowly mix in the warm chocolate and butter. The mixture should become glossy and uniform. Do not worry if it looks richer and thicker than regular cake batter. That is expected. The whipped egg whites added later will provide the air needed to give Chocolate Cloud Cake its lighter structure.
Whipped Egg Whites Create the Cloud-Like Texture
The egg whites are one of the most important parts of this recipe. Begin beating them at medium speed until they become foamy. Then, gradually add the remaining sugar. Continue beating until the whites form glossy medium-to-stiff peaks. They should hold their shape, but they should not look dry or grainy. Overbeaten egg whites can become difficult to fold evenly into the chocolate mixture. Next, stir a small portion of the whipped whites into the chocolate base. This first addition lightens the mixture. Afterward, add the remaining whites in two or three batches. Fold gently with a flexible spatula. Move from the bottom of the bowl upward while rotating the bowl. Most importantly, stop folding once no obvious streaks of egg white remain. Aggressive mixing will knock out the trapped air. Since Chocolate Cloud Cake relies heavily on this foam for lift, careful folding directly affects its texture.
Bake Until the Edges Set and the Center Stays Tender
Pour the batter into the prepared pan and smooth the surface gently. Bake for approximately 30–38 minutes. However, treat that range as a guide rather than an absolute rule. The cake should look set around the edges while the center remains slightly soft. A thin crust may form across the surface. In addition, the cake can puff noticeably in the oven. Avoid repeatedly opening the oven door during the early stages of baking because sudden temperature changes can interfere with the rise. Once the cake appears ready, remove it from the oven and place the pan on a cooling rack. As it cools, the center will probably sink and the surface may crack. That rustic appearance is normal for this style of cake. In fact, it creates the perfect space for the cream topping. Let the Chocolate Cloud Cake cool completely before decorating. Adding whipped cream while the cake is warm can cause the cream to melt.
A Sunken Center Is Usually Part of the Cake’s Character
Many home bakers worry when a flourless cake rises beautifully and then sinks. With Chocolate Cloud Cake, some sinking is expected. During baking, heat expands the air trapped inside the egg foam. The eggs also set and temporarily support the risen structure. After the cake leaves the oven, the air cools and contracts. Since there is little or no flour creating a rigid network, the center can settle. Therefore, a sunken top does not automatically mean the recipe failed. Cracks around the surface can also appear. Instead of trying to hide them, use the shape as part of the presentation. The uneven center holds whipped cream beautifully. However, there is a difference between a tender center and raw batter. The edges should be set, and the cake should have enough structure to hold its shape after cooling. If the entire middle remains fluid, it likely needs more baking time. Conversely, excessive baking can remove the soft texture that makes this dessert special.
Make a Light Whipped Cream Topping
Once the cake is completely cool, prepare the topping. Pour 240 ml cold heavy cream into a chilled bowl. Add one tablespoon of powdered sugar. Then, whip at medium speed until soft to medium peaks form. The cream should hold its shape while remaining smooth and billowy. Avoid whipping until it becomes extremely stiff. A softer texture complements the tender cake much better. Spoon the cream into the sunken center and spread it loosely. There is no need to create a perfectly smooth surface. In fact, natural swirls reinforce the cloud-like appearance. Next, dust the top lightly with unsweetened cocoa powder. Chocolate shavings are another simple option. Fresh raspberries or strawberries can also provide acidity that cuts through the richness. However, keep the decoration restrained. Chocolate Cloud Cake already has a strong visual contrast between its dark chocolate base and pale whipped cream. Therefore, a few carefully chosen toppings usually look more elegant than an overloaded finish.
How to Get a Smooth, Melting Texture
Several small techniques can improve the final texture. First, use chocolate that you genuinely enjoy eating because its flavor will dominate the cake. Second, avoid overheating the chocolate. Gentle melting reduces the risk of scorching or separation. Next, pay close attention to the egg whites. Under-whipped whites provide less structure, while severely over-whipped whites become difficult to incorporate. Folding is equally important. Use broad, gentle movements instead of vigorous stirring. Furthermore, do not automatically extend the baking time because the center looks softer than a standard cake. Chocolate Cloud Cake continues to set as it cools. Overbaking can turn its soft interior into a firmer, drier crumb. Finally, allow enough cooling time. Cutting the cake immediately after baking can make the center appear wetter than it will be once settled. Patience makes a noticeable difference. When these steps work together, each slice should feel rich and chocolatey while remaining softer than a conventional flour-based cake.
Serve Chocolate Cloud Cake at the Right Temperature
This dessert can be served at room temperature or slightly chilled. Each option produces a different experience. At room temperature, the chocolate interior tends to feel softer and more melting. When chilled, the chocolate and butter become firmer, giving the cake a denser truffle-like texture. Therefore, serving temperature depends on the result you prefer. If the cake has been refrigerated, consider letting an individual slice stand briefly before serving. The whipped cream topping means leftovers should be refrigerated promptly. Store the cake covered to prevent it from absorbing refrigerator odors. For the best texture, it is usually most enjoyable within a few days. You can also bake the chocolate base ahead and add the whipped cream closer to serving time. That approach keeps the presentation fresher. Serve Chocolate Cloud Cake with unsweetened coffee, espresso, or tea if you want to balance its richness. Ultimately, this dessert succeeds because it does not need complicated decoration. Its soft center, deep chocolate flavor, and airy cream already provide plenty of contrast.
Why This Chocolate Cake Feels Luxurious Without Being Complicated
The appeal of Chocolate Cloud Cake comes from turning a short ingredient list into several contrasting textures. The top can become lightly crisp and cracked. Beneath it, the center stays soft and rich. Then, cool whipped cream adds a lighter finish. Consequently, every bite moves between intense chocolate and delicate cream. The recipe also demonstrates how technique can matter as much as ingredients. Properly whipped eggs provide lift. Gentle folding preserves that air. Controlled baking keeps the middle tender. Meanwhile, cooling creates the signature sunken shape. None of these techniques requires professional pastry equipment. However, each step rewards careful attention. That balance makes the cake suitable for both casual baking and special occasions. It looks dramatic enough for a dinner table, yet the decoration can remain intentionally rustic. Rather than chasing a perfectly level cake, embrace its cracks and curves. They are part of the dessert’s character. With good chocolate and careful baking, the result is a cake that feels indulgent while remaining surprisingly simple to prepare.
