
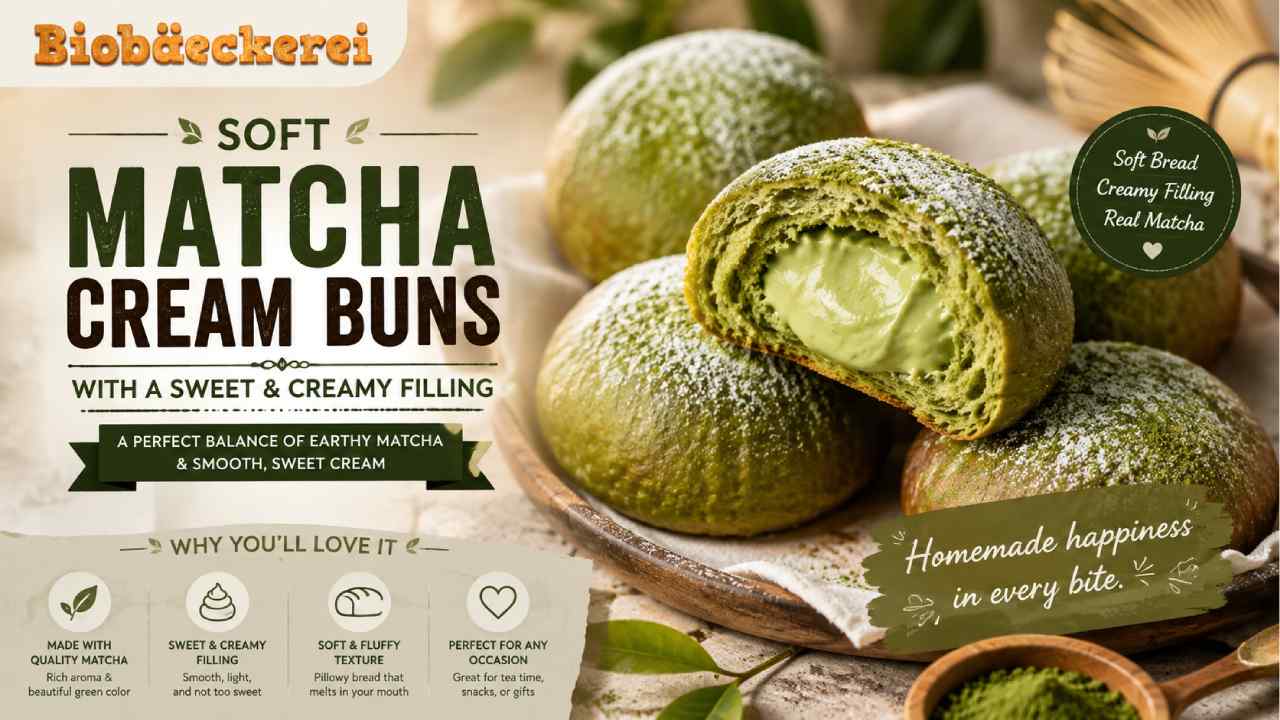
Soft Matcha Cream Buns with a Sweet and Creamy Filling
Biobaeckerei – Matcha Cream Buns combine pillowy bread with a smooth, sweet filling and the distinctive earthy flavor of Japanese green tea. The contrast makes these buns especially appealing. The bread stays light and tender, while the cream adds richness without hiding the matcha. Although bakery-style buns may look complicated, they are manageable at home with careful dough development and fermentation. Matcha quality also matters because its flavor and color influence the final result. For baking, culinary-grade matcha is usually practical and more economical than premium ceremonial matcha. Meanwhile, whipping cream and cream cheese create a filling that holds its shape while remaining creamy. Most importantly, the buns should cool completely before filling. Otherwise, the cream can soften or melt. With that simple rule in mind, homemade matcha buns can deliver a balanced combination of bitterness, sweetness, softness, and creamy texture.
Read Also: Banana Oat Pancakes Make a Wholesome and Delicious Breakfast
Why Matcha Cream Buns Taste So Balanced
The appeal of Matcha Cream Buns comes from contrast. Matcha naturally offers vegetal, earthy, and pleasantly bitter notes. Meanwhile, milk bread is mild and slightly sweet. A creamy filling bridges those flavors with richness. Therefore, the bun does not need an excessive amount of sugar. Too much sweetness can cover the distinctive character of matcha. Instead, the goal is balance. A moderate amount of matcha in the dough gives the bread a recognizable green tea aroma. Then, a lightly sweetened cream filling creates a softer finish. Salt also plays a small but important role because it prevents the bread from tasting flat. This combination explains why matcha works particularly well in baked goods. Its slight bitterness provides contrast to butter, milk, and cream. As a result, each bite can feel rich without becoming overwhelmingly sweet.
Choosing the Right Matcha for Baking
Not every matcha powder performs the same way in baking. Premium ceremonial matcha is designed primarily for drinking and can be expensive. Therefore, good-quality culinary matcha is usually a sensible choice for buns. Look for powder with a fresh aroma and a naturally green appearance. However, color alone does not guarantee quality. Storage also matters because matcha is sensitive to air, light, heat, and moisture. Once opened, keep it tightly sealed and follow the producer’s storage recommendations. In addition, sift matcha before mixing it into flour. Fine green tea powder can form small lumps, which may create uneven streaks in the dough. Sifting distributes it more evenly. Matcha also contains compounds that contribute bitterness, so adding dramatically more powder does not necessarily improve the buns. A measured amount produces a cleaner balance between tea flavor and sweetness.
Ingredients for Soft Matcha Buns
This recipe makes approximately 8 medium buns. Measuring ingredients by weight provides more consistent results than relying only on cups.
For the matcha dough:
- • 300 g bread flour
- • 8 g matcha powder
- • 35 g granulated sugar
- • 4 g instant yeast
- • 4 g fine salt
- • 1 large egg, about 50 g without shell
- • 160 g lukewarm whole milk
- • 35 g unsalted butter, softened
For the creamy filling:
- • 150 g cold cream cheese
- • 180 g cold heavy whipping cream
- • 40 g powdered sugar
- • 1 teaspoon vanilla extract
- • 3–4 g matcha powder, optional
For finishing:
- • Matcha powder for a light dusting
- • Powdered sugar, optional
The exact milk requirement can vary slightly because flour absorbs liquid differently. Therefore, avoid adding extra flour too quickly if the dough initially feels sticky.
Step 1: Mix and Knead the Matcha Dough
- Combine bread flour, sifted matcha, sugar, instant yeast, and salt in a large mixing bowl.
- Add the egg and lukewarm milk. Mix until no large patches of dry flour remain.
- Knead until the dough begins developing structure. Then, gradually incorporate the softened butter.
- Continue kneading until the dough becomes smooth, elastic, and slightly tacky. A stand mixer can make this easier, although hand kneading also works.
- Stretch a small piece of dough carefully. If it forms a thin membrane before tearing, gluten development is well underway.
Avoid using very hot milk because excessive heat can damage yeast. In addition, resist adding large amounts of flour during kneading. A slightly tacky enriched dough often produces softer bread after baking. The dough should become easier to handle as gluten develops and butter becomes fully incorporated.
Step 2: Let the Dough Rise Slowly
Place the kneaded dough in a lightly greased bowl. Cover it so the surface does not dry out. Then, leave it in a comfortably warm place until it becomes roughly doubled in volume. Depending on room temperature and dough temperature, this can take around 60–90 minutes or longer. However, visual signs are more useful than following the clock exactly. Yeast fermentation slows in a cool kitchen and accelerates in warmer conditions. Therefore, avoid forcing the process with excessive heat. Once the dough has expanded, gently press it to release large gas pockets. Do not aggressively crush it. At this stage, the dough should feel softer and more extensible than before fermentation. Proper proofing contributes both texture and flavor. Underproofed buns may become dense. On the other hand, heavily overproofed dough can weaken and lose structure during baking.
Step 3: Shape the Buns Evenly
Transfer the fermented dough to a clean work surface. Divide it into eight equal portions. For greater consistency, use a kitchen scale. Each portion should weigh roughly the same so the buns bake at a similar rate. Next, gently flatten one piece and bring the edges toward the center. Turn it over and roll it against the work surface to create surface tension. Repeat with the remaining pieces. Arrange the shaped buns on a parchment-lined baking tray, leaving enough space between them. Then, cover loosely and allow them to proof again. The buns should become noticeably puffy and lighter. Depending on conditions, the second rise may take about 40–60 minutes. Avoid relying only on a fixed time because fermentation speed changes with temperature. Properly proofed buns should feel airy when touched gently rather than dense and tight.
Step 4: Bake Until Soft and Fully Cooked
Preheat the oven to 175°C / 350°F. Once the buns have finished proofing, bake them for approximately 15–18 minutes. Oven performance varies, so begin checking near the lower end of the range. Matcha dough can make visual browning slightly harder to judge. Therefore, avoid waiting for the buns to become deeply brown. Their surface should look set, while the bread should feel light and springy. If available, an instant-read thermometer provides another useful reference. Enriched bread is generally fully baked when the center reaches roughly 88–93°C. Once baked, transfer the buns to a cooling rack. Most importantly, let them cool completely before adding cream. Warm bread can quickly soften whipped filling. Patience at this stage makes a major difference in both appearance and texture.
Step 5: Prepare the Sweet Cream Filling
While the buns cool, prepare the filling. Place cold cream cheese in a mixing bowl and beat briefly until smooth. Add powdered sugar and vanilla, then mix until combined. In another chilled bowl, whip the heavy cream until it reaches soft-to-medium peaks. Do not continue whipping until it becomes grainy. Next, gently fold the whipped cream into the cream cheese mixture in several additions. This technique keeps the filling light while giving it enough structure for piping. For stronger matcha flavor, sift 3–4 grams of matcha into the filling before the final fold. Taste before adding more. The filling should remain balanced rather than intensely bitter. Finally, keep it refrigerated until the buns are completely cool. Cold filling is easier to pipe and holds its shape better.
Step 6: Fill Each Bun Generously but Carefully
Once the buns are completely cool, make a small opening in the side or bottom of each one. Transfer the cream into a piping bag fitted with a suitable nozzle. Insert the nozzle carefully and pipe until the bun feels slightly heavier. Avoid forcing in too much cream because the bread can split. Alternatively, slice the bun partially open and pipe the filling into the center. This style displays the cream more clearly and creates an attractive bakery presentation. After filling, dust the tops lightly with matcha. Powdered sugar can also be added for contrast. However, use both sparingly. Too much matcha powder on the surface can taste dry and bitter. At this point, the Matcha Cream Buns are ready to serve. For the best texture, enjoy them while the bread is still fresh and soft.
The Secret to a Light and Stable Cream
A good cream filling should feel rich without becoming heavy. Using both cream cheese and whipped cream helps create that balance. Cream cheese provides body, while whipped cream makes the mixture lighter. Temperature is especially important. Heavy cream whips more reliably when it is cold. The mixing bowl can also be chilled beforehand, particularly in a warm kitchen. Meanwhile, overwhipping should be avoided because cream can become grainy and eventually separate. When combining the mixtures, fold gently instead of stirring aggressively. This helps preserve some of the incorporated air. Furthermore, avoid piping the cream into warm buns. Even a well-made filling will soften when exposed to enough heat. If the room is particularly warm, refrigerate the prepared filling until immediately before use.
Common Mistakes That Make Matcha Buns Dense
Dense buns often result from several small mistakes rather than one major failure. First, insufficient kneading can prevent the dough from developing enough gluten structure. Second, adding excessive flour can make the dough too dry. Third, fermentation may be stopped too early. Dough needs enough time to expand before baking. However, overproofing can also weaken its structure. Yeast condition matters as well. Old or improperly stored yeast may produce poor fermentation. Finally, high baking temperatures can set the crust before the interior expands sufficiently. For this reason, follow the dough rather than relying exclusively on time. A well-developed dough should become elastic after kneading. After proofing, it should look noticeably larger and feel aerated. These visual and tactile cues are often more reliable than a timer.
How to Keep the Green Color Looking Attractive
Matcha desserts are known for their green appearance, but baking naturally changes that color. Heat can dull the bright shade of green tea powder. Therefore, do not expect baked matcha bread to look identical to raw matcha. Good-quality powder and careful baking can help preserve a more appealing tone. Avoid unnecessary overbaking because extended heat can deepen the color further. In addition, store matcha correctly before use. Powder exposed to oxygen, heat, and light can lose freshness and color over time. A light dusting of fresh matcha after baking can restore visual contrast. However, remember that raw matcha has a concentrated flavor. A thin layer is enough. The goal is to highlight the tea character without making the surface unpleasantly bitter.
Matcha Cream Buns Are Best Served Fresh
Freshness is one of the biggest advantages of homemade bread. Matcha Cream Buns taste especially good when the bread remains soft and the filling is cold and creamy. Because these buns contain a dairy-based cream filling, they should not be stored like plain bread. Keep filled buns refrigerated in a covered container and follow normal food-safety practices for perishable dairy products. For the best bread texture, another option is to store unfilled buns separately and add chilled cream shortly before serving. Plain baked buns can also be frozen once completely cool. Defrost them before filling. However, avoid repeatedly warming buns after adding the cream because heat will affect the filling. When serving, allow refrigerated buns to sit briefly so the bread loses some of its chill, but do not leave dairy-filled pastries at room temperature for extended periods.
A Simple Bakery-Style Treat Worth Making at Home
The charm of Matcha Cream Buns comes from a relatively simple formula executed carefully. Soft enriched bread provides the foundation. Matcha introduces an earthy bitterness and distinctive aroma. Meanwhile, the sweet cream filling adds a smooth, rich finish. None of these elements needs to overpower the others. In fact, restraint creates the best result. Careful kneading produces a tender crumb, while patient fermentation keeps the bread light. Cooling the buns completely protects the cream from melting. Finally, a small dusting of matcha creates an elegant finish without complicated decoration. The recipe also leaves room for experimentation. Once the basic version works, the filling can be adjusted with white chocolate, red bean paste, or a stronger matcha profile. Still, the classic combination remains especially satisfying because every component has a clear purpose.
